Showing posts with label Crafting with Kidlettes. Show all posts

May 26, 2011

Memorial Day and Homeschooling

In an effort to be more creative and fun in my homeschooling, and because this weekend is Memorial Day, I am going to share a craft that I will be having my small fries do.  We will be making flags!

I think it will be a fun and easy craft involving colored tissue paper, glue, and a flag outline.  I will have the kids use small scraps of red white and blue tissue paper and glue them down onto a line drawing of the American Flag.  Here's the flag we will use, from PrintFree.com.  It is a bit small, but that's developing fine motor skills, right?  I will ask the older kids to make an American flag without the outlines.

Then I will let the kids make their own flags to look like whatever they want.  Rather than printing a blank rectangle on an 8.5 x 11" paper, I'm just going to let them fill in the whole paper on their own, however they like.

I'm hoping that the kids think this is fun.  My oldest is already asking if she can design her own flag, so it's a good sign.  I can't wait to see what they come up with!  Even the almost 3 year old can participate in this.  I got the idea for this lesson/craft from Hot Chalk Lesson Plans Page.

Meanwhile, I'm trying to decide if I want to continue using the K12/IDVA curriculum next year or strike out on my own.  I'd value any input.

Mostly I'm frightened of not being able to properly prepare my kids for their future by not providing them the best education and most needed info.  The whole lesson planning thing makes me shrink in terror.  I'm learning more about the Thomas Jefferson Education method and it is based on the classics, but there is still a decision to be made.


Dec 27, 2009

Handprint Quilt

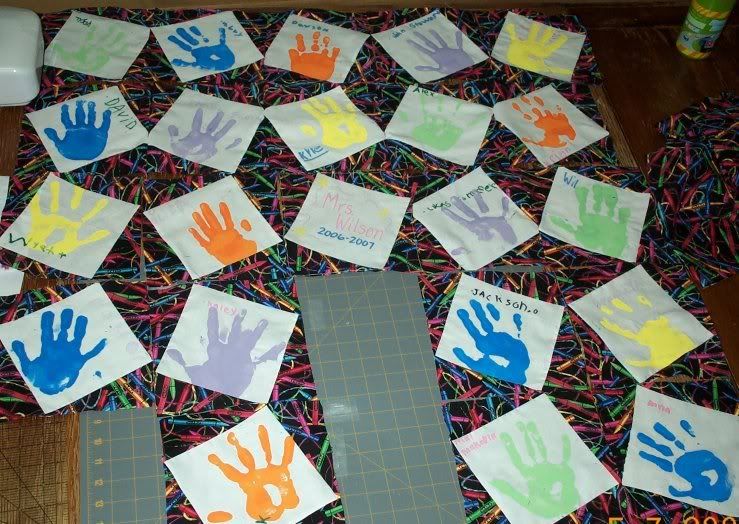
I ran across this cute idea on how-to-quilt.com and thought it would be so nice to share! I have fudged together a handprint quilt before (twice), and will include a picture here, as well as some info from the quilting site. I think I might like to make one for my own family, instead of just the Kindergarten class of 2007.

If you have children who want to help you quilt, here is a fun way to incorporate their little helping hands – literally.

You’ll need paper plates, fabric paint and a stiff brush (like one used for stenciling). Use a solid, light color for your quilt block backgrounds.

Pour some fabric paint onto the plate and smear around. Have the child rub his hand in the paint. Use the brush to cover areas that don’t get completely covered. Use the child’s hand as a stamp to make personalized art on your quilt blocks.

You could leave it just as the hand print. Or, you can let the child be creative and turn those hand prints into other objects. Two hand prints side by side (with thumbs touching) would make great butterflies.

Position the left and right hands with fingers together, thumbs and fingers facing the bottom of the block to create a heart motif. Of course turkeys are popular hand creations, too. You can use hand prints to make animals of all sorts, just let the child be creative.

Accessories like seed beads, ribbons, popcorn beads, etc. usually add just the features you need to make the creative design a little more obvious. In the case of hearts, it usually helps to quilt a heart shape around the hand painted design.

Another variation of this is fingerprint designs. Your children can have loads of fun making people, pets, wild animals, paw prints, and zillions of bugs by using finger prints! Again, adding beads, ribbons and other embellishments will add the finishing touches.

If you decide to try this project, remember that you will need to use paints made especially for fabrics. You can buy a textile medium to add to any acrylic paints you may have on hand. Just follow the manufacturer’s instructions.

It is usually best to paint your quilt blocks on a piece of cardboard (or on a table) with a piece of waxed paper between your solid surface and the fabric. Once the fabric dries enough to move it easily, lay it somewhere else to dry.

To make sure your child’s hand painted quilt designs last for a long time, you need to heat set the paint. Do this by ironing the back side of the fabric. Do not iron on top of the paint and be sure that the design is completely dry first.

If the design is not completely dry, there will be quite a mess to clean up along with a very disappointed child.

Use a fabric pen to have your child add his or her signature to the quilt. When you do this step, explain just how important it is for an artist to sign his or her work. Chances are that your children have seen you doing this and have wondered about its purpose.

For an added surprise, snap a photo of the child or children working on their quilt art. Print the photo on fabric and include it in one of the back corners of the quilt.

Depending on the ages of the children, maybe they can even help piece the blocks together or quilt the project. After the entire quilt is complete, hang it to show or stage a quilt presentation.

This is the perfect sort of project to pass around for oohs and awes at a family gathering. Your children will feel extra proud of their work when they see others appreciating it.


©2009, Penny Halgren
Penny is a quilter of more than 27 years who seeks to interest new quilters and provide them with the resources necessary to create beautiful quilts.

This article courtesy of http://www.How-To-Quilt.com. You may freely reprint this article on your website or in your newsletter provided this courtesy notice and the author name and URL remain intact.

Nov 20, 2008

Hip, Hip... HURRAY!!

Gas prices have finally dropped in our area. We're down to $1.91 at the cheapest place in town. So when I filled up my gas loving van today, I only spent $29.80! MUCH better than that $60 mark a few weeks ago.

For some reason it has taken longer for the gas prices to drop here than elsewhere. Being right on the pipeline hasn't helped the prices. Gouge, gouge, gouge gas people!

I'm teaching home ec right now, five days a week at the charter school my kids attend. It's only an hour a day and it's the 2 6th and 7th grade classes as well as the only 8th grade class. Today will be the first day we actually COOK, and as the classes are being held in the classrooms instead of the kitchen (it being lunch time when we teach), it should be fun. On today's menu: No Bake Cookies. I've heard some very interesting alternate names for this: Chocolate Haystacks, Moose Droppings, Bear Poop - very appetizing, huh?

BB and The Boy are getting along well together. BB loves to laugh at his big brother. BB is finally coming into a schedule at 4 months (knock on wood!) and is a very happy baby. My girls are doing well in school and when the report cards came home last week, I was very pleased.

Okay, I've got housework waiting that has been put off for far too long. Enjoy your day!


Jun 11, 2008

Summer Boredom Busters for Kids


I hate summer in that the kids seem to come to me all day long whining their favorite new tune "I'm BORED!" Usually, it's a password to the bathroom cleaning, baseboard scrubbing world I live in, but I must plead exhaustion this time around.

I've been on the lookout for the $1 kid craft items this summer and found several great options at Michaels and Jo-Ann's, but what about just stuff around the house? It's early June here and still pretty windy and cold, so outside isn't the best option right now. When it is nice enough, you can bet your bippy I boot their butts out the door ASAP for as long as I can.

After reading my copy of Families with Purpose tonight, I thought I'd put together a short post of Summer Boredom Busters culled from many different sources, including TA DA! M.

Organize a Family Olympics
Have a backyard obstacle course
Join a book club or summer library reading program
Take a litter collection walk
Build a Colosseum in the sandbox
Make your own puzzle
Have a scavenger hunt
Spend the afternoon singing everything you have to say
Build your own pinata
Play with water balloons or in the sprinkler
Blow bubbles
Wash the dog
Give the kids some old unused shims, markers and glue and let them go to town!
Play stickers - paper and some old stickers, even old credit card ad stickers, are fun
Make musical instruments
Make Treasure Stones
Make Doorway Dangles
Make your own homemade books
Acrobats
. Enough said.
Have the kids help menu plan, bake special treats, make place mats, play at washing dishes
Make a family newsletter and send to far away relatives
Make your own popsickles

From Family Fun:
Indoor Crafts List
26 Boredom Busters by Parents
99 Days of Summer Games for Kids


image courtesy Morgue File

Feb 27, 2008

God Bless Scribbit

I love Scribbit. She gives me recipes, craft ideas, and personal replies to almost all my comments on her blog. She even visits me, time to time! I wanna be Scribbit when I grow up!

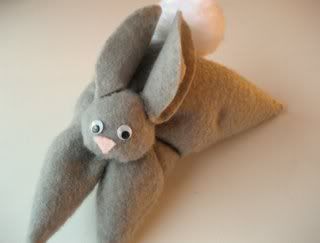
That said, here's a great post of hers about making the cutest little Easter Bunnies from felt. I'm gonna be all over that. Just as soon as the energy fairy comes along.

Any day now...


Hubbers has been home sick with strep throat since last Friday. Whatever else, taking care of a sick and whiny husband is MUCH harder than dealing with sick kids. I've got the black rings under my eyes to prove it...

Dec 28, 2007

School Lunch Savers

Amazingly, the hot lunch program at school isn't required to provide a daily balanced lunch, but just a WEEKLY balance. So if my child eats hot lunch only one or two times a week, she may not get the needed nutrients to grow her body and brain.

And I just can't imagine spending the money to send individual sized chips, drinks, and snacks to school with my kids. Yes, they are cute little things, but mostly you're paying for packaging! Just look at this:

The average mom packs $2.00 worth of pre-packaged goodies into each lunch she sends to school with her kids. (That works out to $720 for 2 kids.)

While the kids aren't in school this week, thanks to the holiday break, here's a quick article on saving money on kids' lunches - up to $400 a year! It's a good time to plan for the upcoming week. The kids always like to help cooking, too, so why not make your own and save money?

Those snack bags of munchies cost a lot! Make your own by pre-packaging chips, pretzels, animal crackers and other snack items into sandwich bags on the weekends. (Have the kids help!) Store them in a big container or basket and just throw them in the lunch box in the morning.

Let the kids create their own pizza lunch kits - Toast bread and cutout little circles with a biscuit cutter. Add small containers of pizza sauce, cheese, and other toppings.

Make fruit gelatin and pudding and put in small plastic containers for the week. Make a large batch of granola bars, cookies, pumpkin bread, banana bread or muffins. Divide them into zip top sandwich bags and freeze so that you can grab one or two when needed.

Brownie bites are simple to make. Bake brownie mix in mini-muffin pans and put three "brownie bites" in a sandwich bag for each child's lunch. They freeze well too!

Fill thermos (not glass) half full with juice the night before and freeze. In the morning, remove from freezer and fill the rest of the way. The juice will be cold when the kids are ready to drink it and it keeps their food cold too.

Clean vegetables, slice into pieces and bag. Preparing a weeks worth of veggies at a time for lunches and snacks saves money and time.

Purchase cheese in blocks, cut into pieces and put in sandwich bags.


Article Source: Creative Homemaking

Dec 8, 2007

Felt Gingerbread Man Ornaments

by Anita Pendley

Description: Adorable gingerbread man ornaments you can make for your Christmas tree.

Cookie Cutters are not just for cookies! Let me teach you how to make an adorable Christmas tree ornament with a Gingerbread man cookie cutter and a little felt. You can "bake" up a whole batch of these very quickly.

You will need:

  • Gingerbread Man Cookie Cutter – I use a metal one because they tend to have simpler designs.
  • Tan rectangle of craft felt
  • Red and White sequins
  • Red and Clear Seed beads
  • Permanent Marker
  • Ink Pen
  • Sharp scissors
  • White, Red, and Tan Embroidery Floss
  • Embroidery Needle
  • Beading Needle
  • 7” cording or very narrow ribbon

Lay cookie cutter onto a tan colored rectangle of felt. Trace around the cookie cutter with a Permanent Marker. Turn felt piece over, and trace a second time making sure not to overlap with first tracing on opposite side of felt. Cut both shapes out just inside the lines. Most likely there will be traces of marker on the shapes, but don’t worry about it. These will be inside the ornament.

Take one of the gingerbread men shapes, and lay him marker side down on a flat surface. Using a ball point pen lightly mark 2 dots for eyes and a faint curved line for his mouth. Also mark 3 or 4 dots down his middle for buttons.

Now embroider him all the way around the outside edge with 2 strands of white embroidery floss using an outline stitch. This creates the look that one would get by outlining a gingerbread cookie with icing. You will have to judge how far from the edge will look most pleasing based on how large your shape is. My cookie cutter was 4.75” tall x 4” across, and my outline is ¼” from the edge.

For his eyes you can sew on black seed beads or embroider them with black embroidery floss using either satin stitches or French knots. Embroider his smile with outline stitches using 2 red strands of floss.

Next give him jewels. Start with his buttons. Using 1 strand of red floss knotted on the end threaded through a beading needle, bring your needle from back to front through one of the button marks. Place a red sequin and a red seed bead onto the needle. Push the needle back through the sequin and through to the back of the felt at the same button mark as before. Continue in same manner with red sequins and beads creating his other buttons and 2 cheeks at the ends of his smile.

Use white floss, white sequins, and clear seed beads to jewel his hands and feet. Put them right on top of the white outline border that goes all the way around him. I use 2 on the bottom of each of his hands, and 3 on the bottoms of each of his feet.

Lay the front and back ornament shapes together matching edges. Make sure the marked edge of the back shape is to the inside. Tie a knot in both ends of a 7” piece of cord or narrow ribbon. Place the cord between the front and back of the ornament forming a loop at the top. Starting near the top of the ornament join the front and back together using an applique stitch with 1 strand of tan floss. Be sure to secure the loop hanger as you stitch.

Stuff with polyester fiberfill and close up the opening, continuing to use the applique stitch.

Anita writes DIY articles and tutorials for the arts and crafts industry. For more information about the felt applique kits she sells please visit her website.

Article Source: http://EzineArticles.com/?expert=Anita_Pendley


This page printed from: http://www.crafty-moms.com/gingerbread-ornaments.shtml


Nov 15, 2007

Thanksgiving Treats for Kids

Here's some great ideas from Family Corner for fun Thanksgiving treats!

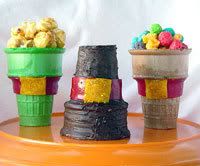
Edible Pilgrim Hats

The kids will just love making these and it will keep them busy enough to stay out of my hair as I holiday bake next week. Grampa on the Farm is coming out, too - maybe he'll do this with them!


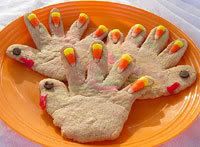
Hand Print Turkey Cookies

They look a little creepy to me, but the kids will p robably like doing them. Something about a hand that you eat? ...shudder... Maybe instead of this we'll do hand print PAPER turkeys with construction paper. A bit more tolerable to me.


Family Corner.com has so many more great Turkey Day ideas - decorating, cooking, crafts, coloring, and more! I won't be paid by Family Corner for this affirmation, but by my children and their joy. Visit anyway!


Oct 16, 2007

Fall Crafts with Kids

I always have such good intentions, but don't follow through as often as I'd like. Here are some ideas I've had on the back burner for about a week. Maybe we'll get some time to do it this weekend!!

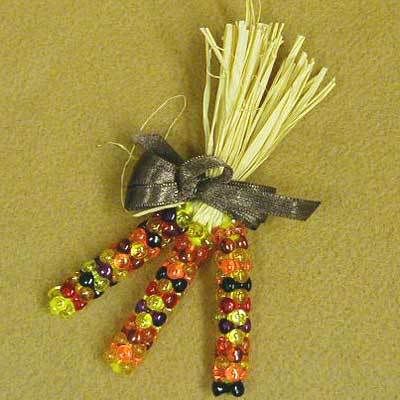
Indian Corn Pin/Magnet
Yo Yo Turkey
Pumpkin in Bloom


Complete Index


(Thanks Barb, for reminding me I forgot to say where I found these wonderful things! Family Corner newsletters come right to my inbox, providing me with loads of creative ideas!)

Sep 12, 2007

Interactive Wall Ideas for Kids Rooms

Description: Ideas for giving your children a space to write on the walls in their bedroom or playroom.

"Don't write on the walls!"

Well, why not? Kids' spaces, whether it's your little one's bedroom, a play area for your home daycare, or just a place for the grandkids to hang out, should encourage imagination and creativity. And yes, that may even include writing on the walls!

However, before you set the kids loose with a box of crayons, here are a few ideas to try:

1. Chalkboard Paint - The things they do with paint now! Yes, if you have a few hours to spare, you can transform a bare wall in your home into a chalkboard, so the kids can create, erase, and create some more...

2. Chalkboard Paint Alternative - If you don't feel like painting, but still like the idea of a chalkboard, you can also pick up peel and stick chalkboard panels. For ideas check out WallCandy® Arts - they make standard rectangular chalkboard panels, as well as other shapes, including circles and jungle animals (yes, elephants, giraffes, and even hippos).

3. Dry Erase Boards - If your children are a little older, and you feel "safe" entrusting them with markers, consider installing a dry erase board. Create, erase, and create some more - this time without the chalk dust.

4. Magnetic Paint - There's more than one way to add an interactive element to those bare walls, and magnetic paint is another ingenious alternative. Unfortunately, most common refrigerator magnets do not work well on magnetic paint. Use flexible rubber sheet magnets instead. The kids can even make their own magnetic shapes after a quick trip to the hobby store. Also, if you can't decide between chalkboard paint and magnetic paint, check out Magnamagic™, one of the more popular magnetic wall paint manufacturers, for magnetic chalkboard paint.

5. Felt Board Walls - Felt boards are popular with toddlers and preschoolers, and it's easy to make one yourself. Using spray adhesive, affix a large piece of felt or flannel to thin plyboard, then anchor securely to the wall. You can then purchase pre-made felt shapes or if you are feeling crafty, make your own.

Dawn Hall is the owner of Wall Murals 1-2-3, a site offering practical, easy to understand how-to instructions and advice for do it yourself wall murals, as well as theme-based ideas & inspiration and reviews of mural products. That's just a start. For more ideas, take a trip to the hardware or craft store, or visit the children's murals area of Wall Murals 1-2-3.

Article Source: http://EzineArticles.com/?expert=Dawn_Hall
printer friendly pages script, php

This page printed from: http://www.creativehomemaking.com/home_decorating/wall-ideas.shtml


Sep 4, 2007

Healthy Kid Snacks!

I'm always looking for something healthy for the kids to snack on (and it doesn't hurt me any, either!) with a little variety. Here's some ideas:


# whole wheat crackers and toppings - try sliced cheese, cream cheese, egg salad, tuna salad, peanut butter, peanut butter and jelly, or pepperoni. Make your own Lunchables by layering ham or turkey and cheese!

# celery and/or carrots with dip - popular dips among kids may include ranch, hummus, creamy italian dressing, bean dip, cream cheese, and other soft cheeses. Try other raw vegetables too, like cucumbers, zucchini and bell pepper slices.

# fresh fruit - different varieties of melon cut into chunks, whole strawberries and pineapple wedges are fun and colorful. Use rounded toothpicks to let kids make their own kabobs or mix several fruits together to make a quick fruit salad; add a dollop of fat free whipped topping.

# apple slices and dip - use an apple slicer or cut into slices with a knife and sprinkle with a little lemon juice to keep them from turning brown. Serve with peanut butter, fat free whipped topping, yogurt, sugar free caramel dip, or other fruit dips.

# tortilla roll ups and pinwheels - spread with peanut butter or peanut butter and jelly, roll up then slice into 1" pieces to make pinwheels. use a layer of cream cheese and a slice or two of turkey or ham, or layer with spreadable cheese and various vegetables, roll up and eat.

# rice cakes - serve plain or spread with peanut butter or Nutella (chocolate and hazelnut spread). Rice cakes come in many varieties and flavors.

# graham crackers - graham crackers are a tasty substitution for cookies. They are perfect for spreading peanut butter or dipping into applesauce.

# tortilla chips & salsa - serve unsalted tortilla chips with homemade salsa. Mix together chopped tomato, chopped green onion, a little garlic salt and chopped fresh cilantro.

# animal crackers - another great substitution for cookies

# dried fruit - everyone knows about raisins, but don't forget all the other wonderful dried fruits available. Dried cranberries, plums, mangos and other tropical fruits are sweet like candy. Due to their natural sugar content they should be served in moderation but definitely in place of processed sweets.

# cereal & granola bars - another great option for quick grab and go snacks, cereal and granola bars come in a wide variety of flavors.

# applesauce - you'd be surprised at the different flavors available in applesauce these days!


Share your healthy snack ideas with me!!

Aug 22, 2007

Kool Aid Yarn - Dyeing is Kid Stuff!


Dying yarn with kool aid drink mix is a fun craft activity for kids.

Making kool aid yarn is a safe and easy project for children and adults. Kids love coloring and making kool aid yarn is a great way for you to have fun with your child. From youngsters to teenagers, kids will love the colors they can dye their yarn to use in other projects.

Kool aid is considered an acid dye. Why? Because it contains citric acid to add tartness to the drink. This acid is needed for the dye reaction to happen.

To make kool aid yarn you must get the right kind of yarn. It must be some type of animal yarn. Wool yarn from sheep, alpaca, llama, etc. work. Synthetic yarn will not work. It will not take up the dye. Be sure to look closely at the yarn in the store where you are purchasing to make sure it is 100% wool.

Buy unsweetened kool aid. If you mistakenly get the sweetened kind, you will cook the sugar and end up with a sticky, icky mess instead of kool aid yarn.

Let the young children come with you to the store to pick out their special colors. One packet of drink mix will color about one ounce of yarn. This will depend on how dark you want your colors. There's no exact formula, so the kids can't make a mistake. Experimenting with the colors is half the fun of making kool aid yarn.

The darker colors make the coolest colors. Try reds, blues, and purple for some really fun coloring. All the other colors work, too. You can tie rubber bands around parts of the yarn that you don't want to color for a different effect.

Remember your colors will dry a shade or two lighter than the color they are while wet. Some of the color may come out in the rinsing, too. So, you may want to intentionally dye the yarn darker than what you really want to achieve the correct color. If you don't care how dark your color is, then don't worry about it.

You need heat and water to get the wool to take up the dye. You can use a microwave, the stove top, or the sun as your source of heat. Adults need to help young children if using the first two sources of heat.

Cool your yarn and dry it. You and your child are now ready to make some really cool projects.

Once adults and children make kool aid yarn you will be dyeing to make it again. It's easy, fun, and smells good, too.

Visit this link for more information on making kool aid yarn. Debby McCandless raises alpacas and dyes their wool.

Article Source: http://EzineArticles.com/?expert=Debby_McCandless


Works for Me! Hosted by Shannon at Rocks in my Dryer.

Aug 6, 2007

Hey KNITTERS!

Great Bernat yard on sale for 97 cents? Here's the link, go get 'em!


Good until 10 August. Guess it's time for me to learn to knit...

Jul 7, 2007

Crochet Tips for Beginners

I really love to crochet and am working on 2 different projects right now. One is ongoing - dishcloths for the kitchen. Every dishcloth in my kitchen is crocheted. This is a good use of spare time sitting at ball games, on road trips, watching movies, and so on. Also a great winter activity!

The other project is a skirt made up of granny squares in the color of the school uniform (navy) for YoungestGirl.

So if you'd like to crochet, learn or brush up, check out this article over at ThriftyFun.com: Crochet Tips for Beginners

Even the 2 oldest kids like to crochet. Now someone needs to put a basics on knitting for beginners! Sadly, I do not knit.

Here is a link to some basic crochet abbreviations. Beginners may want to print this out as a reference. Basic Crochet Abbreviations Chart


Image via Morguefile.com and xandert

Jun 23, 2007

Handprints in Cinnamon

I saw this craft over at And Miles to Go... and loved the idea! I have some homemade cinnamon ornaments (primitive hearts, stars tied with raffia) and kid prints would make them so much cuter!

Here's the basic recipe. Head over to Bridgets' place for more great, creative ideas on sprucing up your handprints.

Cinnamon Craft Dough
  • 4 cups of cinnamon (if you can, buy in bulk--this is cheapest)
  • 3 cups applesauce
  • 1/2 cup white school glue
Mix together all of the ingredients. Keep kneading until it becomes cohesive and smooth. You'll want the consistancy of a grainy cookie dough. Dust your work surface with cinnamon and roll out the dough like cookie dough to about 1/2 inch thick.


Jun 12, 2007

Random Ramblings + Father's Day!

Yup, it's The Man's day this weekend. Will you celebrate the daddy in your life? The kids and I will try to dream up something Hubbers will like and throw in a cool cake for good luck.

Here's a couple of ideas:

There's some cool coloring pages over at crayola.com - just search for Father's Day in the search box. Also, instructions for Dad's Door Hanger, Bow Tie Card, Decorative (box or wall) Tie, Growing Up Hand Prints (a heart squeezer). You have to register for the Crayola site, but it's free.

Here's a cool craft that we just might do for the daddy in our life:

I found this craft (sorry, not from my twisted mind) over at VocalPoint. Yes, you have to be a member there, too, but it's a cool site that gives out free stuff on a regular basis. You can find out more (and sign up!) here.

Daddy's Goodie Can

Materials Needed:
  • Coffee can
  • Large piece of paper
  • Glue or tape
  • Miscellaneous Supplies
Instructions:
  1. Clean the can, ensure all rough edges are smoothed.
  2. Cut the paper to fit around the can.
  3. Decorate sized paper using pictures, sponge painting, finger painting, magazines or small decorations from the craft aisle.
  4. Glue paper on outside of can.
  5. Add goodies inside of can!
My other rambles:

I got to take ALL the kids to the OB this morning for my 8 wk visit. Saw the baby's heartbeat on the ultrasound this morning and tried to hear it, but my uterus is so retroverted (tipped backwards) that it was rather painful for her to use the "magic wand" on me to see the bean. (The tipping due to having babies and has been this way for the last 3.) But we DID see the heartbeat and I saw the spine. Four more weeks, said Dr G.

My thyroid sucks. I have some sort of thing where my body attacks the thyroid and it slowly goes downhill and I have to have more and more meds to control it. Eventually it will peter out, but it hasn't yet. I'm getting my dose adjusted AGAIN and hopefully this will keep me from losing literally HANDFULS of hair each day.

I also have a sinus infection. I get these so regularly that it's not a surprise. I loved my Neti Pot for nasal sinus cleansing but totally spaced it recently. So now I'm taking some nausea inducing meds to clear out the pain and *gross* and hopefully feeling better soon.

OldestGirl won her softball game this morning. They've been doing SO GOOD this season, having won all the games they've played by a smashing lead. 17 to 2 this time. The team has been together for about 2 years now and are much more cohesive than some of the teams they've played.

More? Nah. That's my mental spew for today.

Jun 8, 2007

My Next Apron Adventure

You know it's Apronpalooza right now over at Life is Like a Lunchbox? And today is the LAST day? While I was unable to participate this time (sick, pregnant, and so on) as a sponser from my sewing business (wahmom.com), I'm getting in the spirit by making some of my own.

My children all want in on the fun, too, so we hit the fabric store yesterday for some beautiful fabrics! My pictures aren't so pretty as some blogs I could name (Hello, My Name is Heather, A Number of Things, How About Orange) but I think it's my cheapo camera. Regardless, here's some shots of the new fabrics:


The yellow and blue dots are for YoungestGirl, the butterflies on blue are for OldestGirl, and the odd Hawaiian print is for CurlyGirl. Mine is the pretty pink with flowers. I let them choose their own fabrics and they were VERY excited.

Now, to work...


May 11, 2007

Come on, you KNOW you LOVE her!

It's Mother's Day on Sunday - do you have your appropriate love ready?

Hubbers never remembers this day, but the kids are making things at school, I already know. Here's some ideas for the kids to do for Gramma, Auntie, or you.

Dine Without Whine has a Mother's Day booklet for download. It offers cards to make, poems, crafts and recipes. FREE!

Kinder Art offers a flower craft for your little one to make - looks very cute! We all know that nothing is better than hand-made loveys from the babies.

I very much like DLTK's site for learning at my pre-schooler and kindergartener levels. Never one to disappoint, there's a wonderful section here!

Kid's Domain has some different crafts on offer - pin cushions, bath salts, and so on.

Enchanted Learning has interesting shaped cards, and coupons for your favorite mom.


It's probably not "kosher" to have my kids make crafts for me upon my demand, but they might like to make some for their grandparents. And maybe they'll sneak one in for me?


May 7, 2007

Lookie, Lookie, Little Cookie!!

I got drafted guilted asked to make up a quilt for each of the Kindergarten classes at school this year. Since my daughter is in one of them, and sewing is my business, how could I say no?

I have little experience with the layout and design of quilting - I've only made three of my own. Well, let me amend that to say I COMPLETED one baby quilt for my son, a top for my own king size bed, and a few log cabin rails of the top for my CurlyGirl.

My own quilt has been in the works for several (ahem) years. CurlyGirl's even longer. Shame, shame, shame... At least I can admit it and move on.

Wait, wrong therapy jingo!

Anyhoo - after some design help from a SO knowledgeable friend I got the squares cut and (mostly) sewed together. The fabric was provided to me, so all I'm doing is putting it together.


The hand prints and names on those blocks were made by each kid. The empty spots will be filled in with the school name (sorry, ain't sharin' that) and one empty one for the teacher to journal on, if so desired.

You can click on the image to see a bigger, clearer shot (stupid blogger - not enough SPACE for pix).

Comments, questions, adoration ideas?
Click on Now YOU say... down below and SAY IT!


---------------------------------------------------------
World Breastfeeding Week: August 1 - 7
Locations of visitors to this page

LinkWithin

Related Posts with Thumbnails